app.js
#3.0 The Document Object
console에 document를 입력하면 작성한 html을 가져올 수 있다. 즉 document는 브라우저에 이미 존재한 object다.


console.dir(document)를 실행시키면 말 그대로 object인 document를 출력해주고, document의 property는 그 html의 정보들을 javascript의 관점으로 보여준다.
document.body를 콘솔에 입력하면 html 중 body 태그부분만 보여준다. body, head, html같은 주요 태그들은 이런 식으로 얻어올 수 있지만 그 이하의 태그들은 querySelector, getElementById등으로 찾아와야 한다....
document.location은 현재 디렉터리 경로를 알려준다.


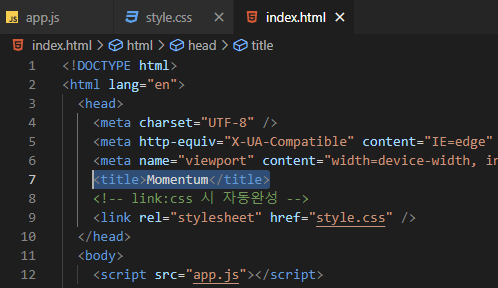
javascript를 이용해 아래와 같이 html을 변경할 수도 있다. (물론 새로고침하면 다시 원래대로 돌아간다....)


<!DOCTYPE html>
<html lang="en">
  <head>
    <meta charset="UTF-8" />
    <meta http-equiv="X-UA-Compatible" content="IE=edge" />
    <meta name="viewport" content="width=device-width, initial-scale=1.0" />
    <title>Momentum</title>
    <!-- link:css 시 자동완성 -->
    <link rel="stylesheet" href="style.css" />
  </head>
  <body>
    <script src="app.js"></script>
  </body>
</html>
이를 이용해 app.js에 document.title = "kimhayeon"이라고 작성한 후, html을 새로고침하면 app.js가 title태그보다 더 나중에 호출되므로 최종적으로 이 html의 ttile은 kimhayeon이 될 것이다.
#3.1 HTML in Javascript
document 내에는 getElementById라는 함수가 있는데, 이 함수는 html에서 id를 통해 element를 찾아준다. 이 element를 찾으면 javascript로 해당 html을 변경시킬 수 있다.
index.html
<!DOCTYPE html>
<html lang="en">
  <head>
    <meta charset="UTF-8" />
    <meta http-equiv="X-UA-Compatible" content="IE=edge" />
    <meta name="viewport" content="width=device-width, initial-scale=1.0" />
    <title>Momentum</title>
    <!-- link:css 시 자동완성 -->
    <link rel="stylesheet" href="style.css" />
  </head>
  <body>
    <hi id="title">Grab me!</hi> <!-- app.js에 의해 GOt you! 가 출력된다. -->
    <script src="app.js"></script>
  </body>
</html>
app.js
const title = document.getElementById("title");

title.innerText = "GOt you!";

console.log(title.id);
console.log(title.className);
#3.2 Searching For Elements
- getElementById : 하나의 값 (id 같이 하나밖에 부여할 수 없는 경우)
- getElementsByClassName() : 많은 element를 가져올 때 사용 (array를 반환)
- getElementsByTagName() : name을 할당할 수 있음 (array 반환)
- querySelector : element를 css selector 방식으로 검색할 수 있음 (ex. h1:first-child, .hello .hi), 단 하나의 element를 return해줌
- querySelectorAll : querySelector의 모든 element를 가져옴
app.js
const hellos = document.getElementsByClassName("hello"); // className이 hello인 모든 태그
const hellos1 = document.getElementsByTagName("h1"); // 모든 h1태그
const hellos2 = document.querySelector(".hello hi"); // hello class의 자식 h1태그만
const hellos3 = document.querySelectorAll(".hello hi"); // hello class의 자식 h1태그만

console.log(hellos);
console.log(hellos1);
console.log(hellos2);
index.html
<!DOCTYPE html>
<html lang="en">
  <head>
    <meta charset="UTF-8" />
    <meta http-equiv="X-UA-Compatible" content="IE=edge" />
    <meta name="viewport" content="width=device-width, initial-scale=1.0" />
    <title>Momentum</title>
    <!-- link:css 시 자동완성 -->
    <link rel="stylesheet" href="style.css" />
  </head>
  <body>
    <div class="hello" >
      <hi id="title">Grab me!</hi>
    </div>
    <div class="hello" >
      <hi id="title">Grab me!</hi>
    </div>
    <div class="hello" >
      <hi id="title">Grab me!</hi>
    </div>
    <script src="app.js"></script>
  </body>
</html>
#3.3 Events
element의 내부를 보고 싶을 때는 console.dir()로 확인할 수 있는데, 그 중 앞에 on이 붙은 element들은 모두 event들이다. (onFocus, onChange, onSubmit, onClick 등등...)
event는 어떤 행위를 하는 것이며 모든 event는 javascript가 listen할 수 있다.
- eventListener : event를 listen하여 javascript에게 무슨 event를 listen하고 싶은지 알려줘야 한다.
- 변수.addEventListener(event) : 누군가가 변수를 event할 것인지 listen한다.
app.js
const title = document.querySelector(".hello:first-child");
console.log(title);
title.style.color = "blue"; // hellos의 style 변경

function handTitleClick(){
  console.log("title was clicked!");
}

title.addEventListener("click", handTitleClick);

handTitleClick();
function handTitleClick(){} 안에 console.log가 아닌 title.style.color = "blue"를 넣는다면, 클릭 시 색깔이 blue로 바뀐다.
#3.4 Events part Two
listen하고 싶은 event를 찾는 방법
1) google에 찾고 싶은 element 이름 검색하기 ex) h1 html eelement mdn(mozilla developer network)
2) 그 중에서 web APIs 이 포함된 페이지 찾기 (JS 관점의 HTML heading element라는 의미)
app.js
const title = document.querySelector(".hello:first-child");
console.log(title);

function handTitleClick(){
  title.style.color = "blue";
}
function handleMouseEnter(){
  title.innerText = "Mouse is here!";
}
function handleMouseLeave(){
  title.innerText = "Mouse is gone!";
}


// 이벤트들을 아래처럼 사용할 때는 property의 이름에서 on을 빼고 사용한다.
title.addEventListener("click", handTitleClick);
title.addEventListener("mouseenter", handleMouseEnter);
title.addEventListener("mouseleave", handleMouseLeave);
#3.5 More Events
app.js
const title = document.querySelector(".hello:first-child");
console.log(title);

function handleTitleClick(){
  title.style.color = "blue";
}
function handleMouseEnter(){
  title.innerText = "Mouse is here!";
}
function handleMouseLeave(){
  title.innerText = "Mouse is gone!";
}


// 같은 코드...
// title.addEventListener("click", handleTitleClick);
// title.addEventListener("mouseenter", handleMouseEnter);
// title.addEventListener("mouseleave", handleMouseLeave);

title.onclick = handleTitleClick;
title.onmouseenter = handleMouseEnter;
title.onmouseleave = handleMouseLeave;
변수.addEventListener("on을 제외한 event 이름", 함수); 로도 쓸 수 있지만,
변수.event = 함수;로 간단하게 선언할 수도 있다.
그러나 addEventListener를 이용한 방법이 선호되는 이유는 removeEventListener를 통해 event listener를 제거할 수 있기 때문이다.
window(창)은 기본으로 제공되며, 이를 이용해 창 사이즈를 조절하는 이벤트를 만들 수 있다.
그 외에도 이벤트들이 굉장히 다양하다. 복사, 붙여넣기를 수행할 경우 실행되는 이벤트, 그 외에도 오프라인이나 온라인일 때 실행되는 함수도 만들 수 있다.
*
혹시 online, offline이 수행되지 않는다면, 개발자도구 - Network - No throttling -> offline을 클릭하면 네트워크가 offline으로 설정되어 와이파이가 끊겼다고 표시한다. 그 이유는 지금 실행하고 있는 코드는 로컬 pc로 파일을 연 것이기 때문에, 온라인 오프라인의 개념이 없는 것이다.
function handleWindowResize(){
  document.body.style.backgroundColor = "tomato";
}
function handleWindowCopy(){ // 복사를 수행하면 (ctrl+c 또는 우클릭 -> 복사) 동작하는 함수
  alert("copier!");
}
function handleWindowPaste(){ // 붙여넣기를 수행하면 동작하는 함수
  alert("paste!");
}
function handleWindowOffline(){
  alert("SOS no WIFI");
}
function handleWindowOnline(){
  alert("ALL GOOOOD");
}

window.addEventListener("resize", handleWindowResize);
window.addEventListener("copy", handleWindowCopy);
window.addEventListener("paste", handleWindowPaste);

window.addEventListener("offline", handleWindowOffline);
window.addEventListener("online", handleWindowOnline);
'javascript > 바닐라 JS로 크롬 앱 만들기' 카테고리의 다른 글
| DAY 8 (0) | 2023.01.03 |
|---|---|
| DAY 5 (0) | 2022.12.30 |
| DAY 3 (0) | 2022.12.28 |
| DAY 2 (1) | 2022.12.28 |
| DAY 1 (0) | 2022.12.27 |


